In order not to let anyone's hard-to-manufactured documents be arbitrarily "trodden", people generally use password protection. In fact, in addition to this common protection method, we can also use more flexible protection measures.
Declined to quote, add watermark to Word document
Nowadays, many netizens are not aware of copyright, so that we can publish any document on the Internet. In order to protect the copyright of their own documents, copyright watermarks can now be added to the documents. Switch to "Design → Watermark → Custom Watermark", in the open window you can add a watermark according to your needs, for example, you can use a text watermark, set the text, font size and other parameters click "OK" (Figure 1).
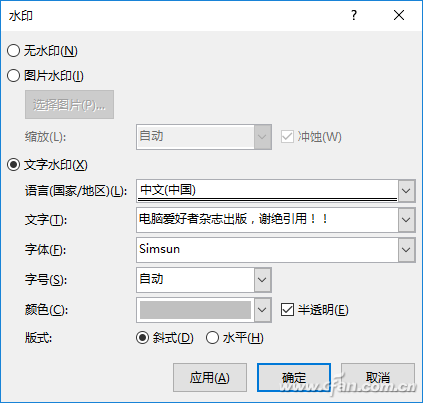
Figure 1 Watermark settings
This returns to the document editing interface, click "watermark", so that the text watermark set above will appear below the text. When we need to publish our own articles online, we can use the screenshots to place the articles on the Internet. Referrers are less likely to cite our articles (Figure 2).
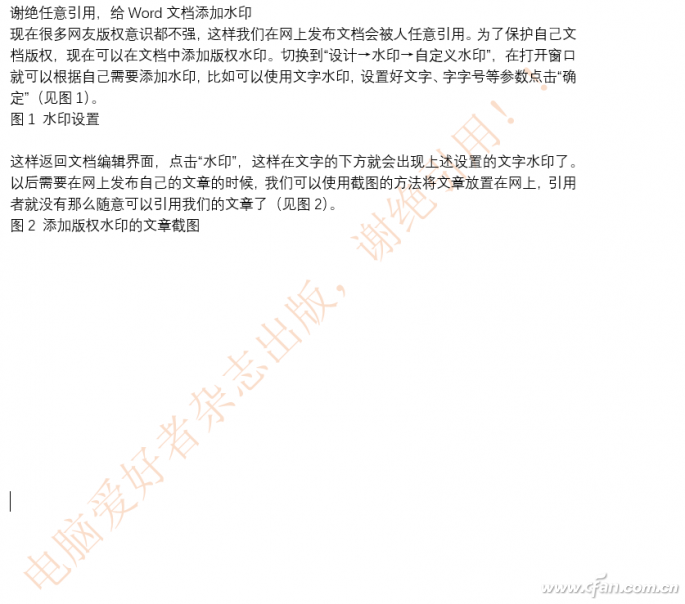
Figure 2 Adding a copyright watermark article screenshot
Word's text watermark is actually a picture or text box lining the text. The default watermark cannot be set to a custom location. So if you want to set the watermark yourself, we can use the method of inserting a text box. Click "Insert → Text Box", and then insert a text box at the place where you want to add a watermark, enter the copyright text of the reminder, select the text box to rotate, and set its layout to be placed under the text. Select the text box and switch to “Format → Shape Fill → No Fill Color†to continue setting “Format → Shape Outline → No Outline†so that a homemade copyright watermark is created. It can be set to any size and moved to any position ( image 3).

Figure 3 Self-made text copyright watermark
Prohibit editing, use forms to protect documents
In our daily documentation, there will be some fixed-format information texts, such as company tax accounts, addresses, bank accounts, and user assessment results. These contents are in a uniform format. To protect this information from being edited by viewers, errors may occur. With Word's "fill in form" function.
For example, for the company department personnel assessment fill in, in order to name the standard, we can set a good name, editors only need to fill in the pass or fail, at this time you can use the form to fill the form of protection. First set up the uniform name text, such as entering the assessment employee's name (Figure 4).
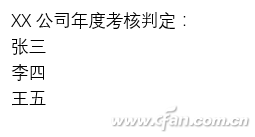
Figure 4 unified name settings
Position the mouse behind the employee's name, click "Development Tools → Legacy Form", and click the "Combo Box (Form Control)" icon in the pop-up menu. This will add a "Combination Box (Form Control) after each person's name. )" icon so that the user can only select in this combo box (Figure 5).
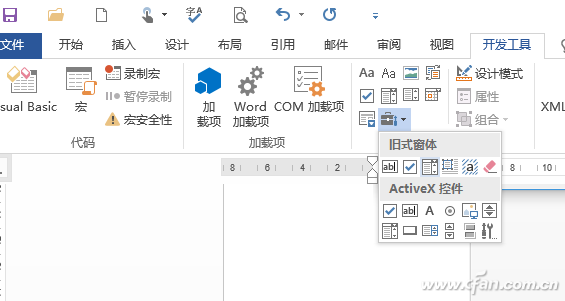
Figure 5 Inserting a combo box (form control)
Double-click on the inserted combo box (form widget), and in the popup window "drag item", enter the "pass" and "nonconformity" options in order, for the user's selection, click "add" and check the "enable Drop-down list" (Figure 6).
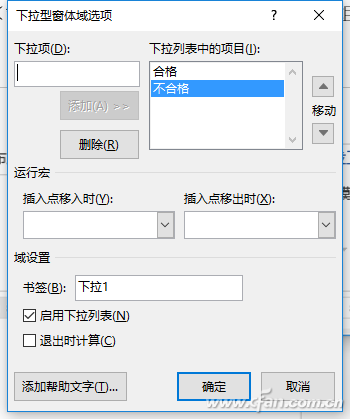
Figure 6 Settings for the drop-down options
Click "Development Tools → Restrict Editing." In the right pane, select the check box "Limit the formatting for the selected style", set the editing limit to "Fill in the form", and click "Yes, start the compulsory protection". The window sets the protection password for forced protection (Figure 7).
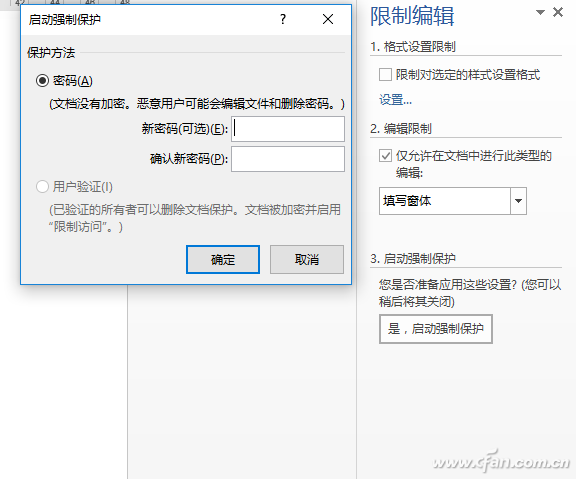
Figure 7 Enable Protection
Pulling the list to “pass†or “nonconformity†choices allows for the protection of the rest of the document without affecting the specific content of the document (Figure 8).
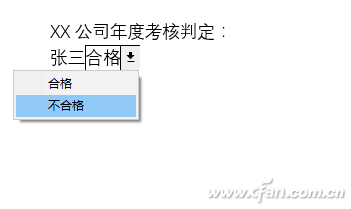
Figure 8 Users can only select text in the drop-down list after protection is turned on
Never peep, hide important text
Some important documents may be saved in some documents, such as product development code, development site, and other important information. If people who do not want to browse the document know this information, we can use “hidden†fonts for protection.
First select the content you want to hide in Word, and then click the "Show Fonts" dialog box in the "Font" group of the "Start" ribbon (you can use the shortcut ctrl+d). In the open window, select the "Hide", click "OK", so that the selected text is automatically hidden (Figure 9).
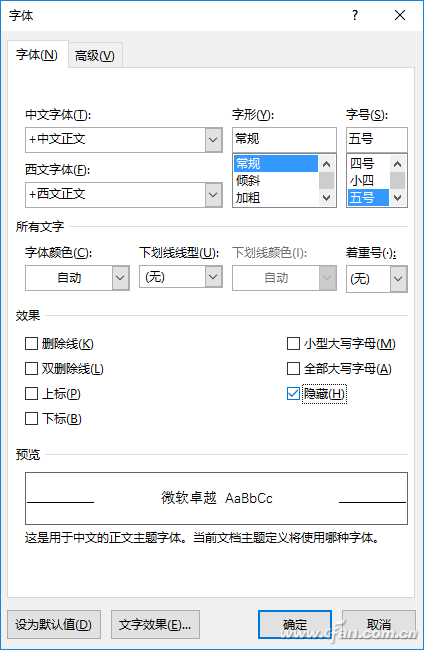
Figure 9 hidden text
If you want to restore hidden files, click "File → Options → Display", check the "Hide Text" in the menu bar on the right, and return to the Word window to display the previously hidden text (Figure 10).
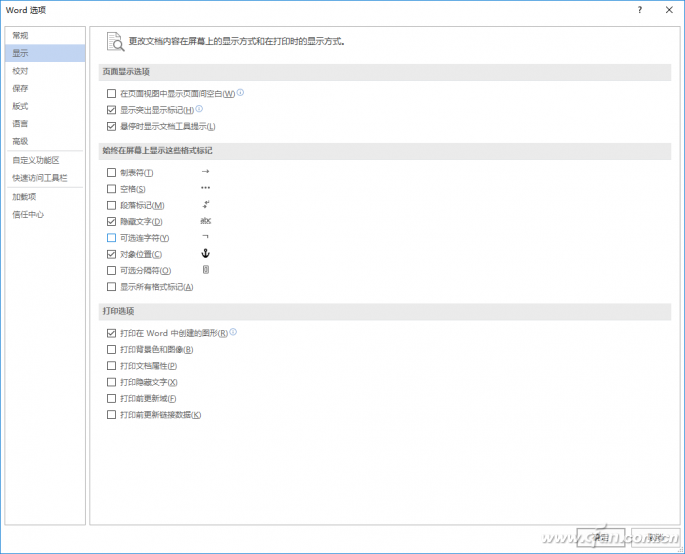
Figure 10 shows hidden text
If you need to hide the inserted picture in Word, double-click the picture and switch to Format → Select Pane. Press ctrl+F1 twice to open the right task pane, click on the eye icon on the right of “picture†to hide and display, and hide and display all the images (Figure 11).
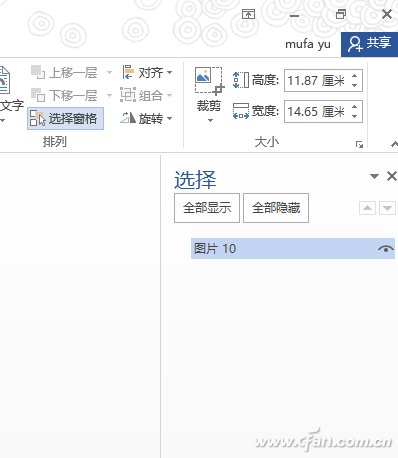
Figure 11 hide picture
It can be seen that the above protection method is much more flexible than the conventional simple addition of password protection, and it can achieve partial protection without damaging the document. There are many similar protection methods for knights. Everyone can use it flexibly in daily operations.
diameter inspection
Henan Yongrong Power Technology Co., Ltd , https://www.hnyongrongglobal.com
